
I never thought I’d fall so hard for a color combination until last spring when my nail tech suggested sage green with pink accents for my cousin’s garden wedding.
At first, I was skeptical—green and pink together?
But the moment she finished that first nail, I was completely obsessed.
The earthy sage paired with soft pink created this unexpectedly sophisticated yet playful look that literally had strangers stopping me to ask about my nails all weekend.
Since that day, I’ve been experimenting with different variations of this magical color combo, collecting inspiration and trying new techniques.
Trust me, once you try this pairing, you’ll wonder why you didn’t discover it sooner.
1. Pastel Pink and Sage Green French Tips
The classic French manicure gets a modern upgrade with sage green tips on some nails and soft pink tips on others.
This look is perfect for those who want to try the trend but still keep things understated.
To achieve this look, apply a nude base coat to all nails and let dry completely.
Using a thin nail art brush, carefully paint the tips of alternating nails with sage green and baby pink polish.
For extra dimension, add tiny gold dots along the line where your colored tip meets the nude base.
The beauty of this design is how it works for any nail length, though it really pops on medium to longer nails where the tips have more space to showcase the colors.
Consider adding a matte top coat for a sophisticated, velvety finish that makes the colors appear even more delicate and powdery.
If you’re feeling adventurous, try a gradient effect where the sage green and pink tips fade into each other on select accent nails.
This manicure pairs beautifully with spring and summer wardrobes but also adds a refreshing touch to fall neutrals when you’re not quite ready to commit to darker seasonal shades.
For an office-friendly version, keep the tips extra thin and subtle for a whisper of color that’s noticeable without being distracting.
The overall effect is elegant yet playful, making it perfect for everything from professional settings to weekend brunches.
2. Sage Green Base with Pink Floral Accents
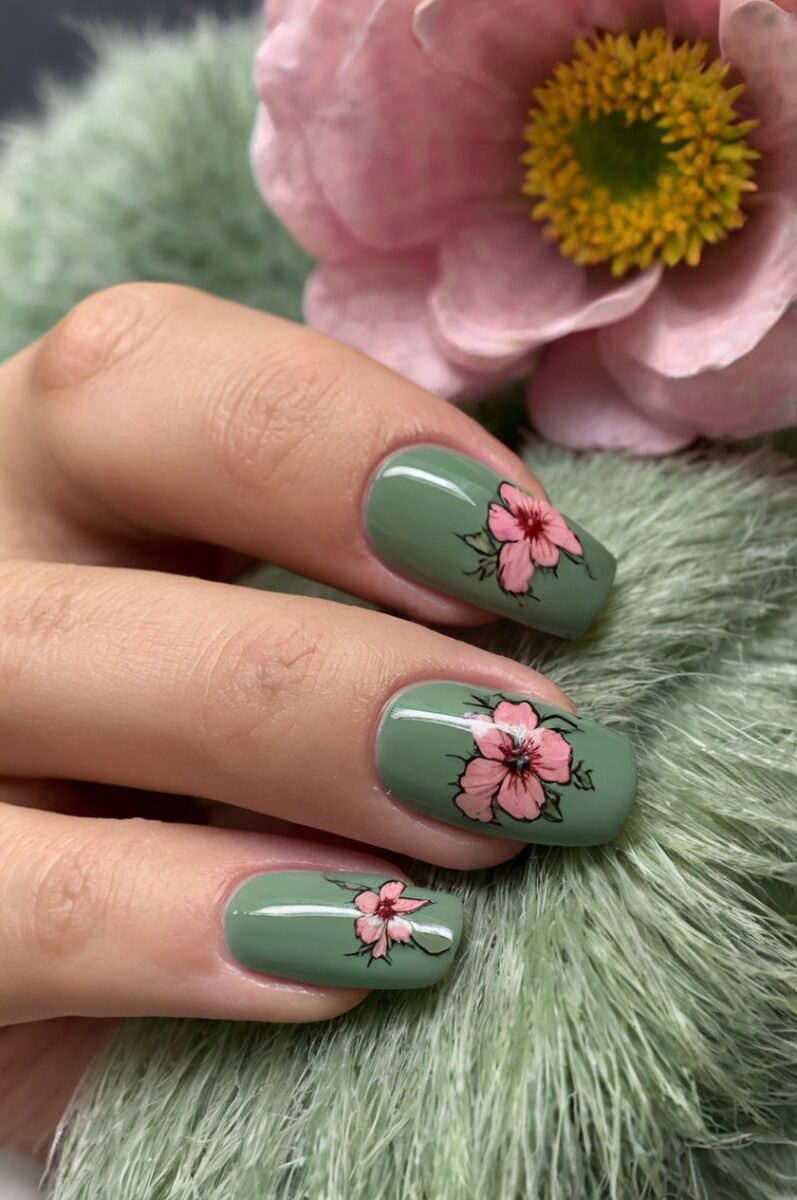
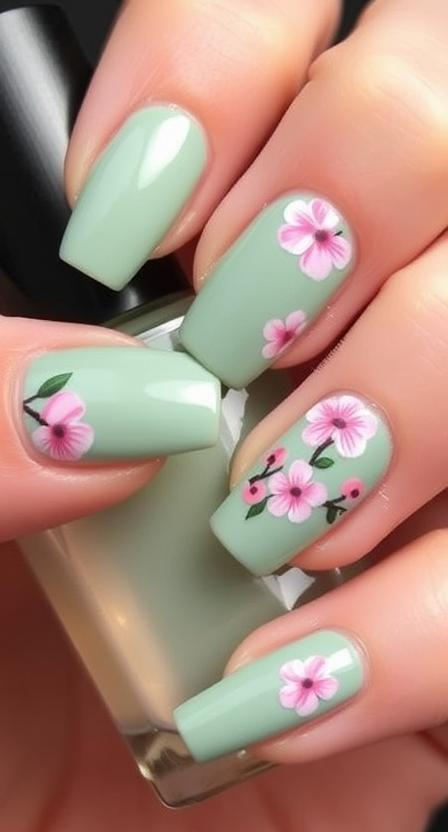
Transform your nails into a miniature garden with a sage green base and delicate pink flower details.
This romantic design channels vintage botanical illustrations while feeling thoroughly modern.
Start with a full coverage sage green polish on all nails, giving each nail two coats for rich, even color.
Once dry, use a dotting tool to create simple pink flowers by making five small dots in a circle pattern.
Add tiny yellow or white centers to your flowers using the smallest dotting tool you have or a toothpick for precision.
For a more elaborate design, use a fine detail brush to paint tiny pink rose buds or cherry blossoms on select accent nails.
The contrast between the muted sage background and the feminine pink blooms creates a stunning visual that’s both earthy and delicate.
Consider adding small green leaves or vines connecting the flowers for a more cohesive botanical theme.
This design looks especially beautiful in spring and summer but can bring a welcome pop of nature-inspired cheer during colder months too.
For a more dramatic version, make the floral design larger on your ring finger or thumb while keeping other nails simple with just the sage base.
The beauty of this manicure is that even imperfect flowers look charming and handmade, making it accessible for nail art beginners.
Finish with a glossy top coat to make the design pop and protect your detailed artwork.
3. Marble Effect with Sage and Pink Swirls
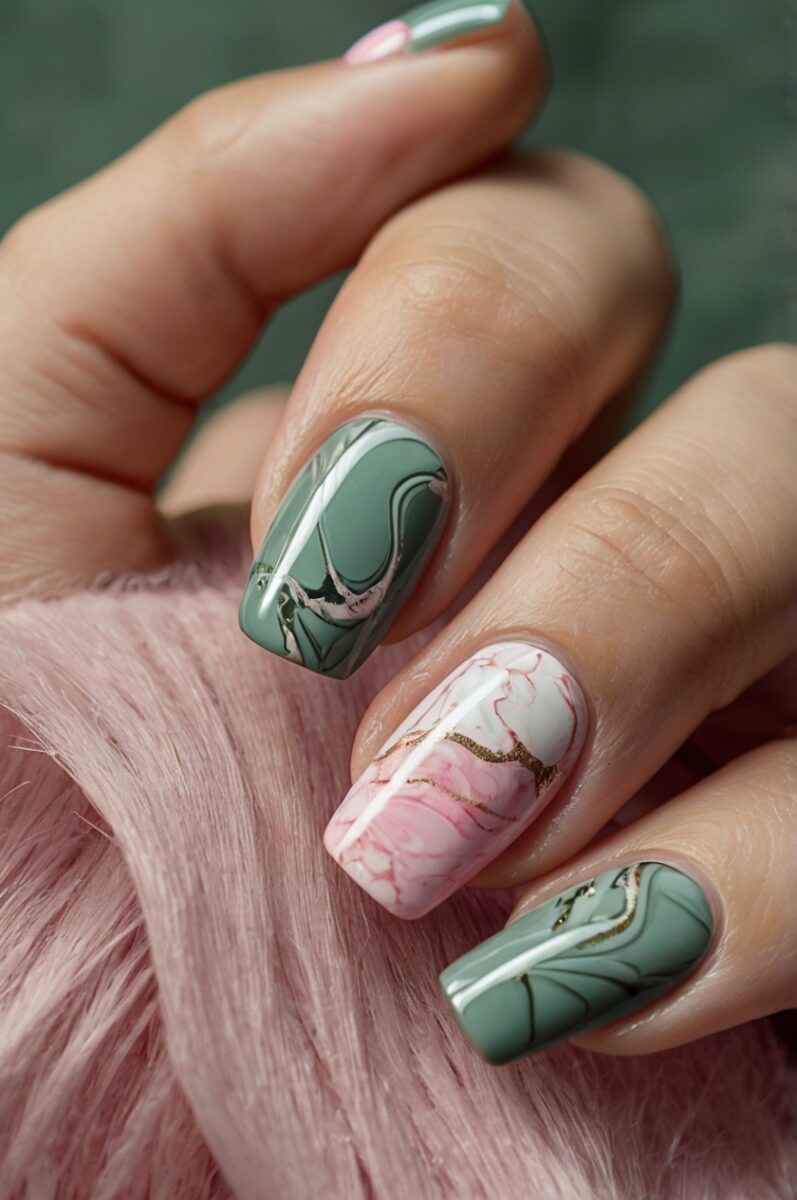
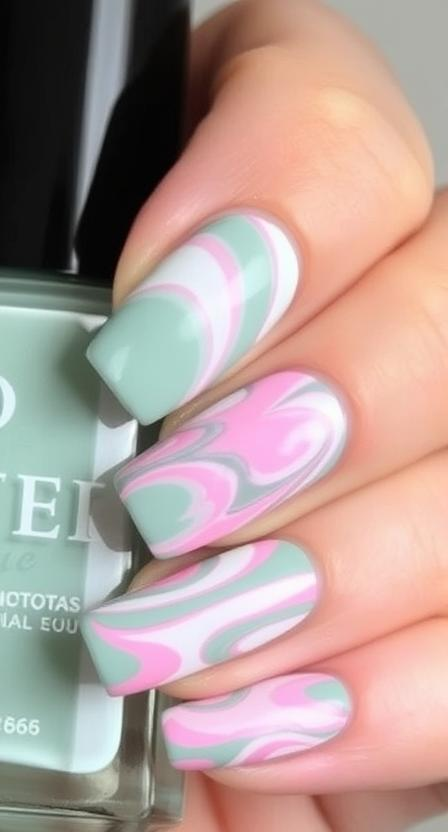
Channel luxury stone with this hypnotic marble effect that blends sage green and pink in fluid, organic patterns.
This elevated design looks complex but can be achieved at home with surprisingly simple techniques.
Start with a white or very light nude base on all nails to help the marble colors stand out.
Drop small amounts of sage green and pink polish onto a silicone mat or plastic sandwich bag.
Use a thin dotting tool or toothpick to gently swirl the colors together without overmixing.
Press your nail gently into the swirled polish, then lift quickly to transfer the marble pattern.
Clean up any excess polish around your cuticles with a small brush dipped in acetone for a professional finish.
For variation, make some nails predominantly sage with pink accents and others mostly pink with sage swirls.
The natural, non-uniform nature of marble means each nail will be unique, creating an artistic manicure that’s truly one-of-a-kind.
Add a touch of white polish to your marble mix to create lighter areas that give dimension to the pattern.
For extra luxury, incorporate a metallic gold or rose gold polish into select swirls to mimic the natural shimmer found in high-end stone.
Seal your marble masterpiece with a thick, high-gloss top coat that enhances the stone-like appearance and gives significant depth to the design.
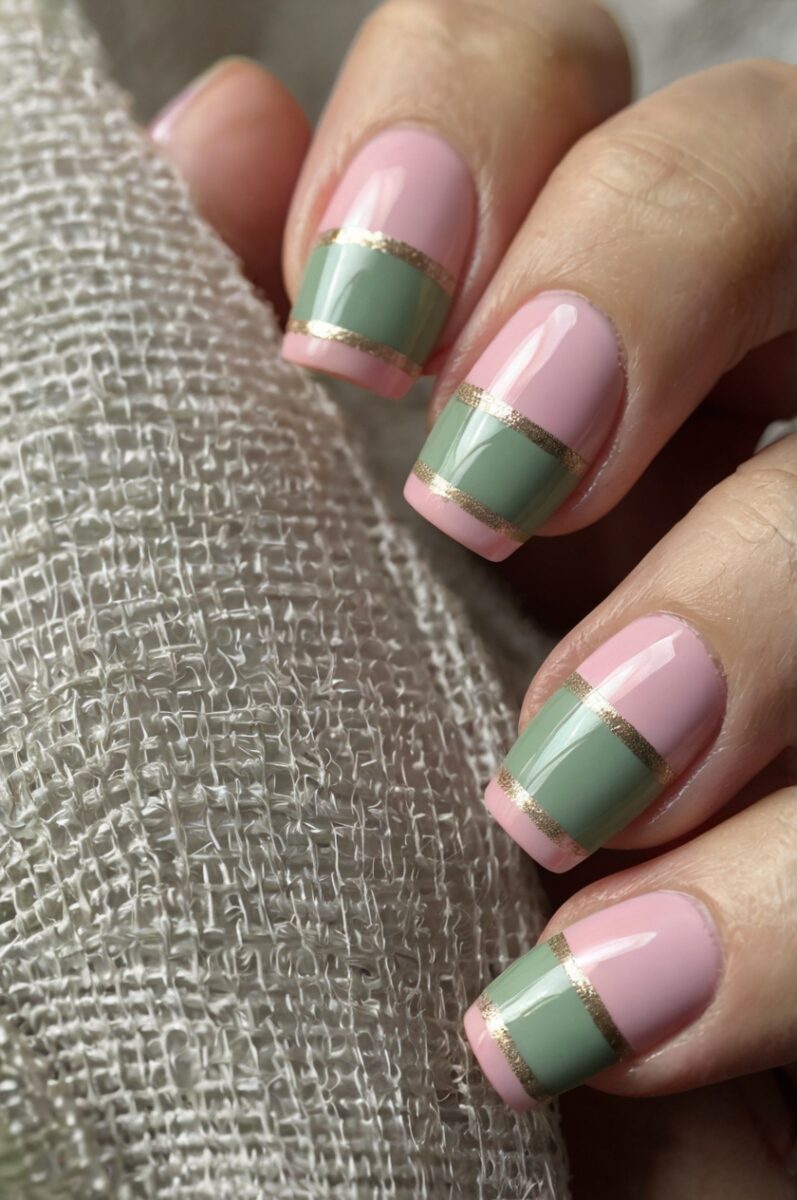
4. Sage Green and Pink Color Block Design
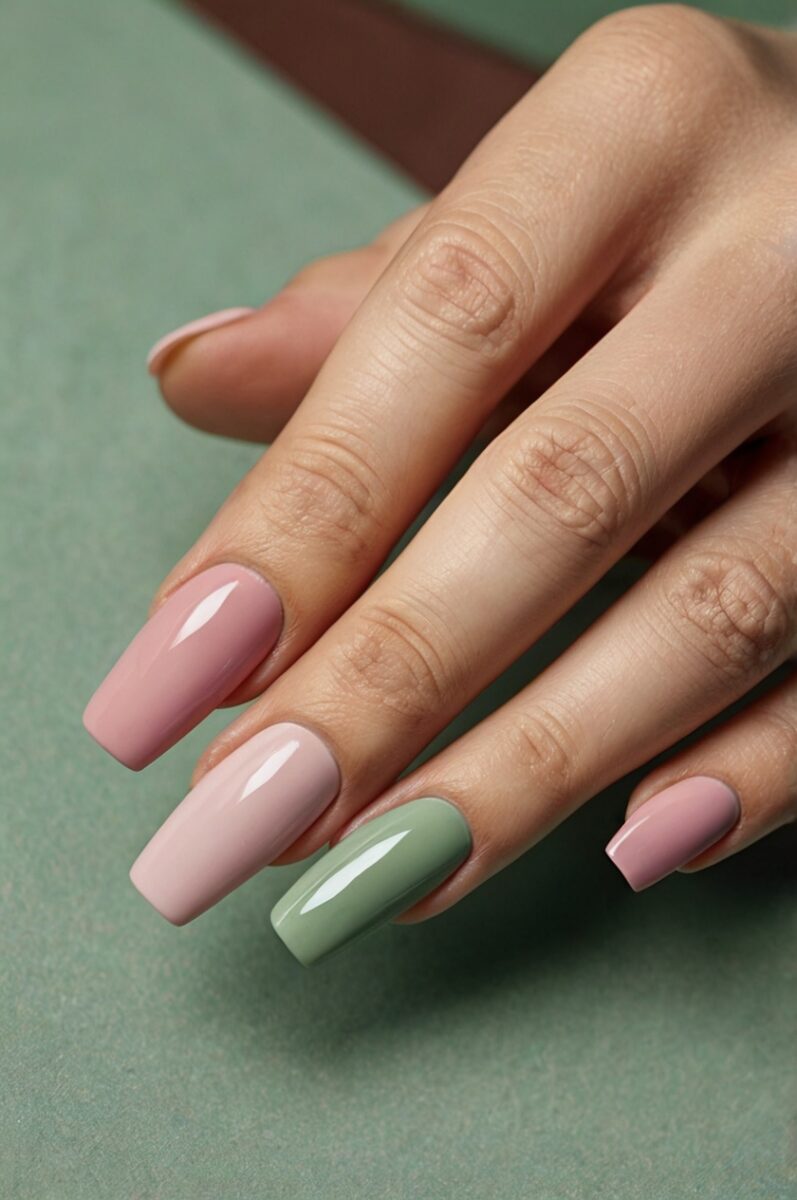
Make a bold geometric statement with clean lines dividing sage green and pink sections on each nail.
This architectural approach to nail art creates a modern, artistic look that’s surprisingly easy to execute.
Start by applying a base coat of either sage green or pink to all nails.
Once completely dry, use nail tape to create straight lines across your nails in your desired pattern.
Paint the exposed sections with your contrasting color, removing the tape while the polish is still slightly wet for the cleanest lines.
Try diagonal splits, horizontal halves, or even triangular sections for different geometric effects.
For a more complex design, use multiple pieces of tape to create interesting shapes like chevrons or color-blocked corners.
The crisp contrast between the soft sage and pretty pink creates a visual tension that’s highly fashion-forward.
Consider adding a metallic silver or gold line where the two colors meet for an extra touch of sophistication.
This design works beautifully on both short and long nails, though longer nails provide more canvas for complex blocking patterns.
For an office-appropriate version, keep the color blocking subtle with just the tips or small sections in the contrasting shade.
Finish with either a glossy top coat for a vibrant, high-contrast look or a matte top coat for an ultra-modern, architectural finish.
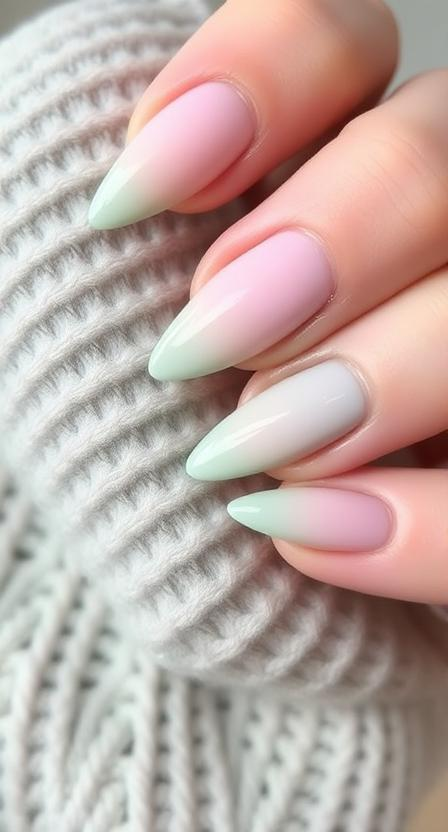
5. Gradient Ombré from Sage to Pink
Create a dreamy, ethereal effect with a smooth gradient that transitions from sage green to soft pink.
This sophisticated design looks professional but can be achieved at home with a makeup sponge and some patience.
Begin with a white base coat on all nails to help the colors appear more vibrant in your gradient.
On a makeup sponge, stripe sage green polish next to pink polish, slightly overlapping them in the middle.
Dab the sponge gently onto your nail, rolling slightly to transfer the polish in a smooth gradient.
Repeat the dabbing motion 2-3 times on each nail, allowing a brief drying period between applications for the best color buildup.
Clean up around your cuticles with a small brush dipped in acetone to reveal the perfect fade effect.
Try different gradient directions—horizontal from tip to cuticle, vertical from side to side, or diagonal for added interest.
For a softer look, add a third transition color like a pale peach or white between the sage and pink to create an even more gradual blend.
The ombré technique gives the nails a sophisticated, airbrushed quality that looks impressive yet remains subtle and wearable.
Consider doing most nails in the gradient style while making one or two accent nails solid sage or pink for contrast.
Seal with a high-gloss top coat to smooth out any texture from the sponging process and enhance the seamless color transition.
6. Sage Green with Pink Glitter Accents
Combine earthy sage with sparkling pink glitter for a manicure that balances natural and glamorous elements.
This unexpected pairing creates a look that’s perfect for special occasions while still feeling grounded and sophisticated.
Apply sage green polish to all nails as your base color, using two coats for opaque coverage.
On accent nails (typically the ring finger and thumb), apply a layer of clear polish while it’s still tacky.
Carefully sprinkle or place fine pink glitter onto the accent nails, focusing on specific areas like the tips for an ombré effect.
For a subtler approach, try a thin line of pink glitter just along the tips or in a delicate curve near the cuticle.
The contrast between the matte, earthy sage and the sparkling pink creates a beautiful tension that catches the light gorgeously.
Experiment with different glitter sizes—micro glitter for a refined shimmer or chunky glitter for a bolder statement.
For added dimension, mix rose gold glitter with the pink for a multifaceted sparkle effect that complements the sage beautifully.
Be sure to seal your glitter nails with two layers of top coat to ensure a smooth finish without any rough texture.
Consider a glitter gradient effect where the sparkle becomes more concentrated toward the tips for a waterfall-like appearance.
This design transitions seamlessly from day to evening and adds unexpected glamour to even the most casual outfits.
7. Sage and Pink Polka Dot Pattern
Embrace playful retro vibes with a whimsical polka dot design combining sage green and pink in various patterns.
This cheerful nail art brings a sense of fun while still utilizing the sophisticated color palette that makes this combination so special.
Start with a base of either sage green or light pink on all nails, applying two coats for even coverage.
Use a dotting tool dipped in your contrasting color to create perfectly round dots in your desired pattern.
Try different dot sizes and spacing—uniform grid patterns for a classic look or random placements for a more modern approach.
For an eye-catching accent nail, reverse the base and dot colors to stand out from the rest of your manicure.
Create an ombré dot effect by concentrating dots at the tip and gradually spacing them further apart toward the cuticle.
The combination of structured pattern and soft colors creates a perfectly balanced manicure that’s both cute and sophisticated.
For a more abstract approach, use dots of different sizes clustered together in organic groupings across select nails.
Consider incorporating tiny gold or silver dots among your sage and pink ones for subtle metallic dimension.
This design is particularly flattering on shorter nails where the pattern remains proportional to the nail size.
Finish with a glossy top coat to seal your dots and prevent them from chipping or smudging.
8. Sage Green and Pink Negative Space Design
Embrace minimalist chic with strategic bare areas that create modern geometric patterns between sage and pink polish.
This contemporary approach lets your natural nail show through as part of the design for an artistic, editorial look.
Begin with a clear base coat to protect your natural nail and create a smooth surface for polish application.
Use thin nail art tape to mask off geometric shapes—triangles, stripes, or crescents work beautifully.
Apply sage green to some sections and pink to others, removing the tape while polish is still slightly wet.
The negative space acts as a third “color” in your design, creating a sophisticated three-tone effect.
For a more subtle approach, try using a very sheer pink that lets a hint of natural nail show through rather than bare negative space.
This technique works especially well on longer nails where there’s more canvas to showcase the geometric patterns.
Consider keeping some nails entirely sage or pink to balance the more complex negative space designs on accent nails.
The combination of earth-toned sage, feminine pink, and natural nail creates a harmonious balance that feels both organic and designed.
For added interest, try a matte top coat on the colored sections while leaving the negative space glossy for textural contrast.
This design approach feels gallery-worthy yet wearable, making it perfect for creative professionals or special events.
9. Sage Green and Pink Chevron Pattern
Create a dynamic, energetic design with angular chevron patterns combining these two complementary colors.
This geometric nail art adds movement and visual interest while maintaining the sophisticated sage and pink palette.
Start with a neutral base like white, nude, or clear polish to help your chevron colors stand out.
Use chevron nail vinyls or create your own template with thin striping tape applied in V formations.
Apply sage green and pink polish to alternating sections, removing the tape or vinyl while the polish is still slightly wet.
For a more subtle look, try painting the entire nail sage green, then adding just thin pink chevron lines on top.
The angular nature of chevrons creates a modern, slightly retro vibe that adds energy to this otherwise soft color combination.
Try varying the width and direction of your chevrons across different nails for a more playful, asymmetrical effect.
For an elegant twist, paint most nails solid sage green or pink and save the chevron design for just one or two accent nails.
Consider adding metallic gold or silver to the points of the chevrons for a touch of glamour and definition.
This pattern looks striking on all nail lengths but makes a particularly bold statement on longer, almond-shaped nails.
Seal with a high-gloss top coat to enhance the crisp lines and protect your detailed design.
10. Sage Green with Pink Holographic Accent
Combine earthy sage green with futuristic pink holographic effects for a manicure that bridges natural and fantastical elements.
This unexpected pairing creates depth and dimension that catches the light in mesmerizing ways.
Apply sage green polish to most nails, creating a grounded, muted base for your design.
On accent nails, apply a pink holographic polish that shifts and changes as it catches the light.
For a more subtle approach, try a holographic top coat over pink polish rather than an intensely holographic formula.
The contrast between the flat, earthy sage and the multidimensional holographic pink creates fascinating visual tension.
In different lighting conditions, this manicure will transform—subdued in soft light but bursting with pink rainbows in direct sun.
For added interest, try a holographic gradient with the most intense holographic effect at the tips, fading toward the cuticle.
Consider adding tiny sage green details over the holographic pink, like small leaves or geometric shapes, to tie the design together.
This combination works beautifully for festival season, vacations, or anytime you want your nails to make a surprising statement.
The holographic element adds a contemporary edge to the otherwise vintage-feeling sage and pink combination.
Seal with a glossy top coat to enhance the holographic effect and ensure it sparkles to its full potential.
11. Sage Green and Pink Striped Design
Create clean, tailored nail art with alternating stripes of sage green and pink for a preppy yet modern look.
This classic pattern gets a contemporary update with this unexpectedly harmonious color combination.
Start with a neutral base coat like white or clear to help your stripe colors appear true to tone.
Use thin striping tape to create evenly spaced horizontal or vertical lines across your nails.
Apply alternating stripes of sage green and pink, removing the tape while the polish is still slightly wet.
Try different stripe widths—hairline thin for a delicate look or broader bands for a bolder statement.
For variety, create different stripe directions on different nails—horizontal, vertical, and diagonal for an eclectic collection.
The structured pattern balances the softness of these colors, creating a manicure that’s both pretty and architecturally interesting.
Consider a gradient effect where stripes start wide at the cuticle and become progressively thinner toward the tip.
For a twist, try a single thick stripe of one color against a background of the other rather than multiple thin stripes.
This design is particularly effective on longer nails where there’s more room to showcase the striped pattern.
Seal with a glossy top coat to smooth over any ridge lines from the striping tape and create a professional finish.
12. Sage Green with Pink Metallic Foil Accents
Create a luxurious, textured look by combining flat sage green polish with gleaming pink metallic foil elements.
This mixed-media approach adds dimension and creates a high-end nail art design that looks professionally done.
Apply sage green polish to all nails, using two coats for rich, even coverage.
Once dry, apply a small amount of foil glue to specific areas where you want your pink foil to adhere.
When the glue becomes tacky (usually after 1-2 minutes), press pink metallic foil firmly against the nail and then pull away to transfer.
The foil creates irregular, organic patterns that catch the light beautifully against the matte sage background.
Try different placement techniques—random scattered foil for an abstract look or concentrated areas for more deliberate design.
For a cosmic effect, focus the foil at the tips and fade it as you move toward the cuticle, creating a starry night appearance.
The metallic pink has an almost liquid metal quality that adds unexpected luxury to the earthy sage base.
Consider adding a few touches of silver or gold foil alongside the pink for a multi-metal, jewel-like effect.
Be sure to seal the design with two coats of top coat, as foil elements can be delicate and need extra protection.
This combination creates a fascinating textural contrast between the smooth, matte sage and the reflective, slightly raised foil.
13. Sage Green and Pink Abstract Brush Strokes
Embrace artistic expression with free-form brush strokes combining sage green and pink in painterly patterns.
This approach celebrates imperfection and creates a one-of-a-kind, gallery-worthy manicure every time.
Start with a nude or white base coat to create a clean canvas for your abstract design.
Using a thin nail art brush, create loose, confident strokes of sage green across the nail in varying directions.
Add pink brush strokes that intersect, overlap, or dance alongside the sage elements for dynamic tension.
The beauty of this design is in its intentional imperfection—no two strokes should be identical.
Try different brushing techniques like dry brushing (minimal polish on the brush) for textured, feathery strokes.
For added dimension, incorporate tiny dots, dashes, or small geometric elements among the larger brush strokes.
Consider adding a third complementary color like gold or white for small accent details that make the design pop.
This abstract approach allows for personal expression and works beautifully on nails of any length or shape.
The combination of structured sage and playful pink creates a balanced composition that’s both sophisticated and artistic.
Seal your masterpiece with a glossy top coat to bring the elements together and protect your unique nail art.