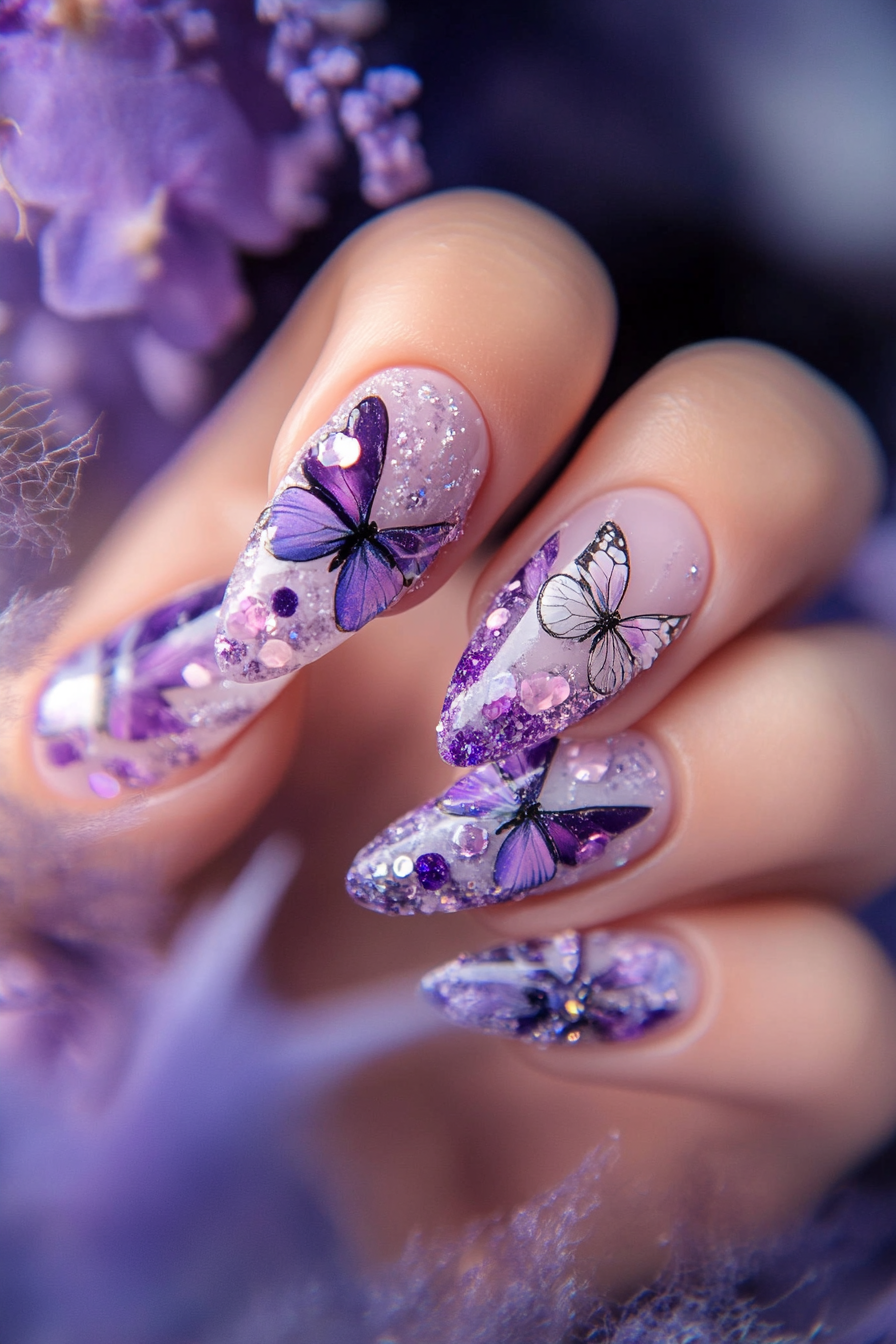
Butterflies are one of the most popular and whimsical nail art designs out there.
Their colorful wings and delicate beauty make them a favorite motif for nail technicians and clients alike.
Play with different colors, sizes, and styles to create a look that’s uniquely you.
Add rhinestones, glitter, or acrylics to take your design up a notch.
The possibilities are endless when you let your imagination take flight!
Keep reading for step-by-step instructions, tips, and photos of 13 of my favorite butterfly nail ideas.
Watercolor Butterfly Nails


First up, we have a colorful watercolor butterfly design that’s easier to achieve than you may think!
Here’s how to get this look:
Start by painting your base coat and background color.
A light blue or purple works well.
Once dry, use a detail brush to paint on the bodies of the butterflies in a dark color like black or brown.
Next, take various bright nail polishes in shades like orange, pink, yellow and green.
Water down the polishes with a few drops of water or nail polish thinner on a palette.
Then use the detail brush to paint on the watercolor wings of the butterflies.
The trick is to apply the polish lightly and blend the edges for a diffused, painterly look.
Finally, use a small dotting tool dipped in white polish to add tiny white dots along the wings and body for details.
Top it off with a glossy clear coat to seal in the design.
The great thing about watercolor nails is that they don’t have to look perfect.
The softer, blended look is part of the charm.
This eye-catching design makes your nails look like a watercolor painting!
Abstract Butterfly Nails

For a more abstract take on butterflies, try this graphic butterfly design.
Here are some tips:
Start with a base coat in a neutral nude or light pink.
Then use striping tape to section off triangles pointing towards the nail tip.
Paint each section a different bright color like yellow, blue and purple.
Once dry, carefully remove the striping tape to reveal the geometric pattern.
Use a detail brush to paint a butterfly body in each section in a dark color.
Add angled wings stemming from the bodies in a lighter shade.
Finally, remove the striping tape and finish with a glossy top coat to smooth and seal the design.
The color-blocked sections paired with the abstract butterflies create a cool optical illusion effect on the nails.
It’s an edgy, artistic way to incorporate butterflies into your manicure!
Butterfly Nails with Rhinestones


Blinged-out butterflies are always a showstopper!
For seriously sparkly butterfly nails, follow these steps:
Start by painting your nails with 2-3 coats of a shimmery polish that contrasts with your rhinestones, like a silver, pale blue or pink.
For accent nails, paint on a butterfly wing outline using black polish.
Once dry, use a pair of tweezers to place colorful rhinestones along the wings to mimic butterfly patterns.
Try using a mix of different shaped rhinestones for extra dimension.
The options are endless – go for an ombré rainbow effect, jewel-toned wings, or silvery crystals.
Apply a strong top coat like Gelous by OPI to smooth and set the rhinestones.
The end result is dazzling, glittery butterflies that are sure to steal the show!
Dress up the remaining nails with additional rhinestone accents for maximum bling.
3D Butterfly Nail Design


Ready to take your butterflies to the next level?
Try sculpting life-like 3D butterflies out of acrylic or gel.
Here’s how:
Start by applying your gel base colors in a natural nude and pale blue.
Then use acrylic or builder gel to sculpt a 3D butterfly body and wings on your accent nail.
Using a detail brush, define the wings with pinks, oranges and yellows.
Carefully attach rhinestones or glitter along the edges of the wings with gel adhesive for a touch of sparkle.
Use a dotting tool dipped in white acrylic to add tiny white dots on the wings.
Finally, encapsulate the entire 3D design in clear acrylic or non-wipe gel top coat to smooth and seal in your work of art.
The end result is an eye-catching 3D butterfly perched right on your nails!
Practice and patience is needed for sculpting, but the wow factor is so worth it.
Floral Butterflies Nail Design


What’s better than butterflies and flowers?
Combining them into one fresh manicure, of course!
Here are some tips:
Start with a base of nude or light pink polish.
Paint on butterfly wings in bright shades like orange, yellow and fuchsia.
Use a detail brush to add tiny dots along the edges.
Once dry, use a dotting tool to paint on flowers over the wings and on the nails using coordinating greens, pinks, and blues.
Focus flowers near the butterfly bodies for a natural look.
Finally, finish with a glossy topcoat to really make the colors pop!
The 3D floral effect makes it look like delicately painted butterflies have landed on a garden growing right on your nails.
Feel free to get creative with the flower types and color pairings.
It’s a lovely summer-inspired design.
Geometric Butterfly Nails

Put a cool geometric spin on butterflies with this angular nail design.
Here’s how:
Start with a base color like white, black, or light gray.
Use striping tape to section off triangles or asterisk shapes.
Fill them in with bright shades like pink, blue and lime green.
Once dry, use a small angled brush to paint elongated geometric butterfly wings extending from the color-blocked shapes.
Keep them in the same color families.
Finish with a glossy top coat to smooth and complete the design.
The color-blocking combined with the graphic butterfly wings creates nails that are modern and whimsical at the same time.
It’s an edgy take on butterfly nails that stands out from the crowd.
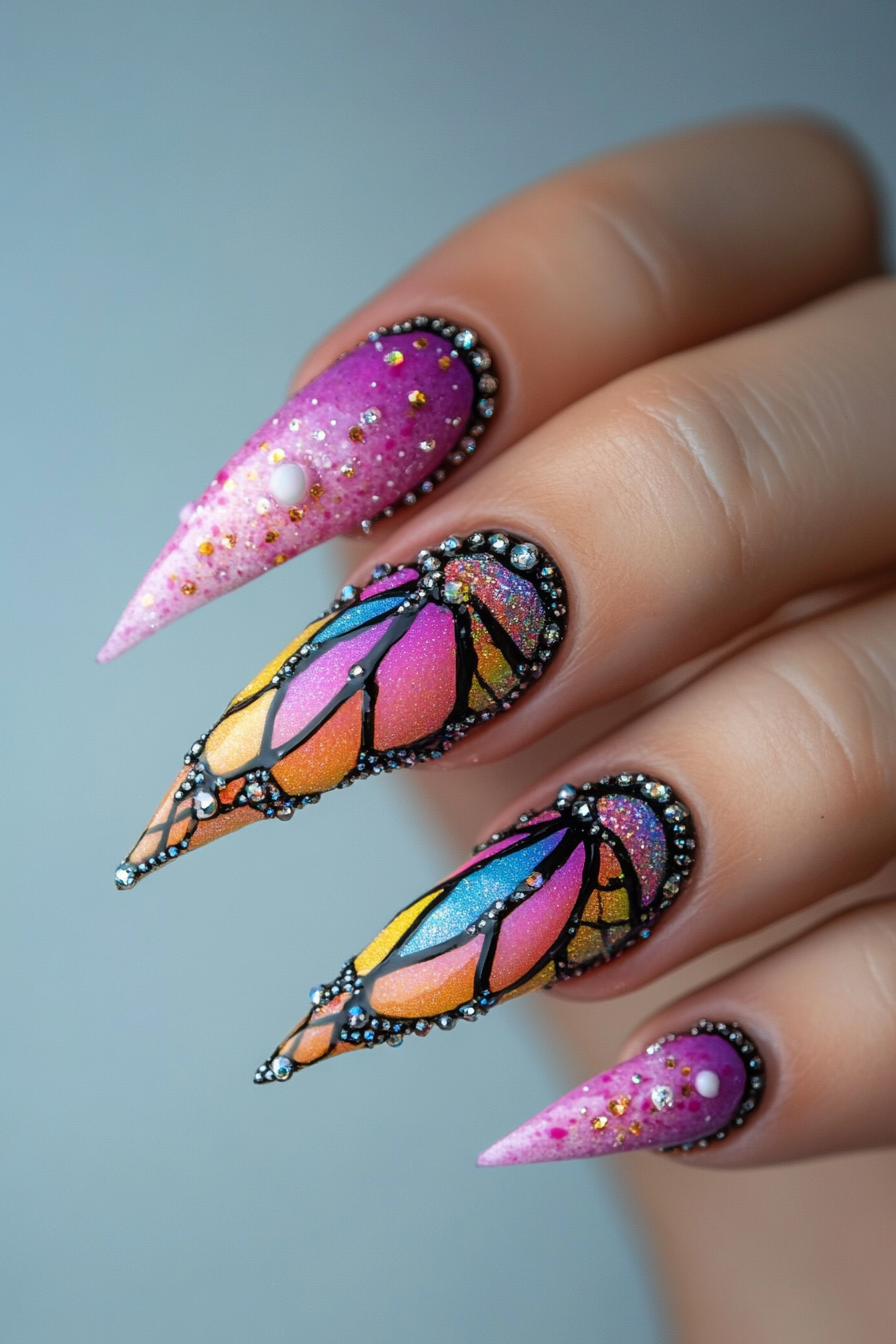
Butterfly Stiletto Nails

Want to really accentuate the wing effect?
Stiletto shaped nails are perfect for butterfly designs.
Follow these tips:
Start by prepping stiletto nails with your base and desired background color.
Use a striping brush or small dotting tool to paint a butterfly body on each nail in a dark color like black or brown.
Then paint wings stemming from the body outward towards the nail points.
Make them asymmetrical and curved for an abstract effect.
Use bright colors like teal, orange, purple and lime green.
Finish with a glossy top coat for a smooth, vivid butterfly design.
The stiletto shape naturally highlights the butterfly wing effect.
Flaunt your colorful wings with pride!
Acrylic Butterfly Nail Art

Take your butterfly wings to new heights by sculpting them with acrylic!
Here’s how to achieve this show-stopping look:
Start with a natural pink or nude acrylic base.
Then begin sculpting one half of a butterfly wing along the sidewall of the nail using white acrylic powder.
Curve it and extend it past the nail tip.
Repeat on the other sidewall to complete the wings.
Use an acrylic brush and colored acrylic powders to paint wing details like stripes, spots, or ombré fades.
Finish by filing and buffing to perfect the shape.
Apply gel polish and a glossy gel top coat for shine.
The acrylic allows you to create wings that are thick, pronounced and customized exactly how you want.
The end result is a set of bold, artistic butterfly wings on each nail!
Butterfly Wing French Tip

For a dainty take on butterflies, try this butterfly wing French tip design.
Here’s how:
Start by applying your base color in a soft hue like pale pink or peach.
Paint the tips with white polish, extending it into a rounded shape on each side of the nail to look like wings.
Use a small brush to outline the wings in black polish and define details like veins.
Add dots along the edges for a whimsical touch.
Finish with a sheer top coat to let the colors shine through.
The white wingtips paired with the clean lines and dots creates a simple, delicate nail look reminiscent of butterfly wings.
It’s a cute and easy everyday design!
Pastel Butterfly Nails

When it comes to butterfly wings, soft pastel colors are a classic choice.
Here are some tips for sweet pastel butterfly nails:
Apply two coats of a light base color like lilac, mint or baby blue.
Use a small angled brush to paint on butterfly wing shapes in coordinating pastels – try soft yellow, pink, blue and purple.
Add white details to the wings with delicate dots and lines using a toothpick or dotting tool.
Finish with a sheer topcoat to blend the pastels together.
Keep the wings rounded and imperfect for a whimsical effect.
The light colors and soft edges give these butterfly nails an ethereal, romantic vibe perfect for spring.
Negative Space Butterfly Nails

Negative space nail art is a huge trend right now.
Try the technique with this artsy butterfly design:
Start by painting alternating nails with your two chosen background colors.
Once dry, use striping tape to section off abstract organic shapes towards the nail tips.
Fill in the exposed sections with the opposite color.
Remove the tape carefully to reveal the negative space shapes.
Lastly, use a detail brush and black polish to outline butterfly wings, bodies and antennae over the color-blocked sections.
Finish with a glossy top coat.
The contrasting colors along with the graphic butterfly outlines result in an abstract nail look that’s equal parts edgy and whimsical.
Use this same negative space technique to create any butterfly pattern you can imagine!
Water marble Butterfly Nails

Looking for showstopping butterfly nails that shine?
Try water marble nail art!
Here are some tips for beginners:
Fill a bowl with room temperature water and add a few drops of black polish.
Use a toothpick to swirl and create flower-like shapes.
Dip each nail into the water, allowing the polish to transfer onto your nail for an abstract marbled design.
Work quickly before the polish spreads too much.
Once dry, use a small brush to outline butterfly wing shapes over the marbled pattern.
Connect them to create bodies and antennas.
Finish by sealing in your design with a high-shine gel top coat.
It takes some practice, but the water marbling technique results in mesmerizing one-of-a-kind designs.
The black marble base with bright butterflies makes for an eye-catching combo!
Stamped Butterfly Nails

Lastly, try stamping for an easy way to get picture-perfect butterflies on your nails.
Here’s how:
Apply your base coat and background color, then load a butterfly nail stamping plate with polish.
Carefully scrape and stamp the image onto your nails.
Use a detail brush to touch up any missing spots, then top coat to smooth and finish.
Metallic and holographic polishes work nicely for a flashy effect.
Stamp different sized butterflies on each nail for a coordinating yet varied look.
The stamped images look like professional nail art while being quick and simple to do at home.
Butterfly nails are a fun, beautiful way to spread your wings and show off your creativity.
The next time you give yourself or a client a manicure, consider incorporating delicate wings, intricate patterns and vivid colors to create your own wearable works of art.
There are so many ways to customize butterfly nail art and make it your own.

