I discovered that bobs come in so many variations – blunt, stacked, textured, wavy, and more – but they all had one thing in common: they were unbelievably flattering for fine hair.
The shorter length prevented hair from getting weighed down and falling flat, while strategic layering and shaping throughout the cut created the appearance of thickness and volume.
It was like the hair gods had answered my prayers!
🙏
Now, I’m on a mission to spread the gospel and help other fine-haired women discover the life-changing magic of bob haircuts.
💇♀️
If you’re struggling with flat, thin strands that just won’t cooperate no matter what you do, keep reading for my ultimate roundup of the most volumizing, density-building bob hairstyles that will make you fall in love with your fine hair.
Trust me, if these cuts can transform my stubborn strands, they can work wonders for anyone!
The Blunt Bob: A Classic Choice for Fullness


When it comes to creating the illusion of thicker, fuller hair, you really can’t beat a classic blunt bob.
✂️
There’s something about that crisp, sharp, single-length cut that makes fine hair instantly appear more substantial and weighty.
By removing wispy, straggling ends and ensuring that hair is cut precisely to one uniform length, a blunt bob builds in density and structure that fine hair so desperately needs.
I find that the most volumizing variation is a blunt bob that grazes the jawline or chin.
This magic length is short enough to eliminate limpness but long enough to create a widening effect that amplifies the look of thickness.
It’s all about that strategic horizontal line across the bottom that tricks the eye into perceiving more width and heft.
The best part about a blunt bob is its deceptively effortless wear.
Unlike bobs with lots of complex layering, a classic blunt cut is basically wash-and-go.
A little volumizing mousse scrunched into damp roots, a quick rough dry with your blowdryer, maybe a few spritzes of thickening spray and light zhuzhing with your fingers, and you’re good to go!
The bluntness does all the heavy lifting for you in the volume department.
I also love how versatile a blunt bob is for different face shapes and features.
If you have a rounder face, keeping the bob a little longer with some slight layering around the front can elongate and slim.
For square faces, a chin-length blunt bob with a middle part softens and balances sharp angles.
And if you have finer features, a shorter blunt micro-bob packs a chic, gamine punch.
One of my favorite styling tricks for my blunt bob is to use velcro rollers at the crown while my hair is still warm from the blowdryer.
I take a mohawk section on top, mist with heat protectant spray, then wrap it up in 2-3 jumbo velcro rollers.
I let them cool completely while I do my makeup, then remove to reveal crazy lifted, bouncy roots and a fuller silhouette overall.
It’s a game-changer!
If you’re craving a style that will make your fine hair look significantly thicker, fuller, and healthier with minimal effort, you can’t go wrong with a classic blunt bob.
It’s the cut that started my love affair with bobs for fine hair and is still one of my go-to’s for maximum volume.
Definitely consider it for your next chop!
💇♀️
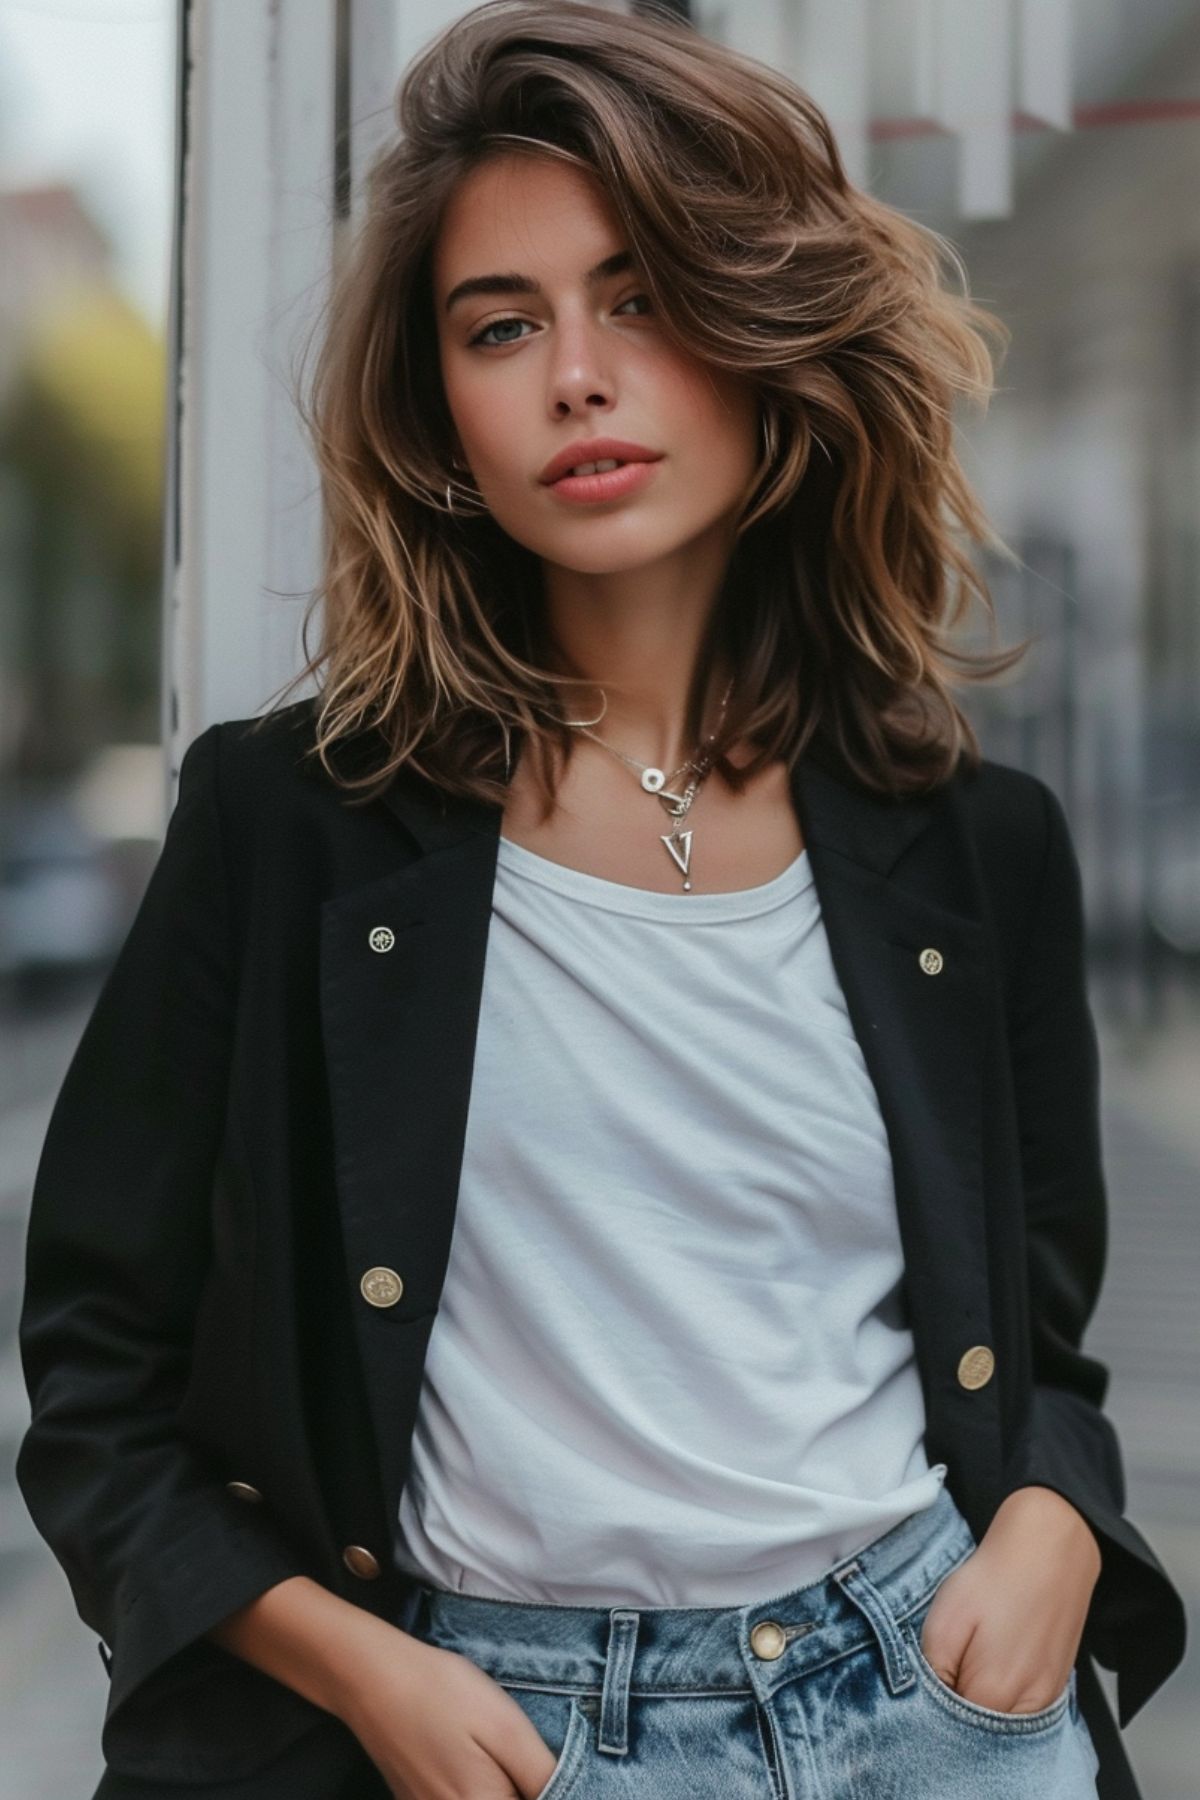
Textured Bob with Piece-y Waves for Effortless Volume


As much as I adore the structure and polish of a classic blunt bob, sometimes I want a more effortless, undone look that’s all about carefree volume.
That’s where a textured bob with plenty of piece-y, tousled waves comes in to play – it’s the ultimate cool girl style for fine hair.
😎
This variation on the bob is all about very deliberate, imperfect texture and lots of beachy movement.
Rather than keeping the ends blunt and strict, your hairstylist will go in and slightly razor or point cut the ends to thin them out and create a choppier, more jagged shape.
They may also slice into the interior of the cut with thinning shears to carve out lighter, airier pockets that encourage bendy waves and lift.
I find a textured bob looks amazing with some gentle balayage or babylights woven throughout.
Having your hairstylist paint in a few lighter pieces from the midlengths to ends, especially around the face, adds dimension and contrast that fine hair really benefits from.
It creates the illusion of more depth and density, tricking the eye into seeing thicker hair.
Plus, the beachy vibe of textured waves really lends itself to some sun-kissed highlights.
🌞
To style a textured bob, I pretty much exclusively air dry to maximize the natural movement.
I like to towel dry my hair until it’s about 70% dry, then liberally mist a sea salt spray from roots to ends and scrunch it into my strands.
The salt spray encourages that gritty, piece-y texture, while the scrunching promotes my natural wave pattern and volume.
Once it’s fully dry, I’ll go in and define a few bends with a 1-inch curling wand, then shake it all out with my fingers for a perfectly undone finish.
I’m obsessed with a textured bob paired with a center part for that ultimate model-off-duty, French girl aesthetic.
There’s something about the imperfect waves and slightly messy part that looks so effortlessly chic and really taps into the carefree spirit of this cut.
It’s perfect if you’re going for that “I woke up like this” aura.
That said, a textured bob also looks phenomenal with a deep side part for even more root lift and volume at the crown.
Simply use your fingers or the end of a comb to create a slightly diagonal part from your hairline back to the crown, then zhuzh the heavier side forwards to build extra body.
It’s like an instant volume injection!
The beauty of a textured bob is that it’s the ideal low-maintenance cut for fine-haired women who want fashionable fullness without a ton of styling time.
Chopping your locks to bob length instantly removes weight and bulk so hair is less likely to fall flat, while the deliberate texture and subtle layering builds in effortless waves and lift that give the impression of thickness.
Truly my desert island haircut for easy breezy, bountiful strands!
🏝️
Stacked Bob: The Secret to Major Volume in the Back

If you’ve ever struggled with your fine hair looking limp and flat in the back, a stacked bob is about to become your new best friend.
This ingenious haircut basically defies gravity, creating dramatic volume and heft at the back of the head for a 360º fuller look.
🙌
A stacked bob is similar to a graduated bob, but with way more density-building layering in the back.
The shape is shorter in the back and gradually gets longer towards the front, with tons of stacked layers cut in to really boost volume and body from every angle.
It’s like an optical illusion that makes it look like you have way more hair than you actually do!
The magic of a stacked bob all comes down to the careful layering and graduation in the back.
Your hairstylist will take super thin sections of hair, over-direct them, and cut them at a steep angle to create almost like a “stacking” effect of shorter to longer pieces.
This clever cutting technique forces all those layers to stack on top of each other when styled, giving the illusion of thickness and dimension.
Meanwhile, the longer pieces in the front keep the overall silhouette sleek and modern, so the voluminous back doesn’t veer into dated pouf territory.
It’s all about that balance of drama in the back and streamlined chic in the front.
The result is a bob that looks wildly thick and full from the sides and back, but still relatively low-key from the front view.
I’m not ashamed to admit I’ve actually gotten whiplash from doing double takes at my own reflection when rocking a stacked bob.
😂
The experience of catching your side or back view in the mirror and marveling at all that newfound volume never gets old!
It’s by far the most transformative cut I’ve tried for mimicking the look of dense, abundant hair in the typically flat back section.
Styling a stacked bob is all about maximizing the volume of those stacked layers.
I like to start with a thickening spray or mousse on damp hair, then flip my head over and blowdry the back section using my fingers to really lift the roots and accentuate the layers.
Then I take a medium round brush to smooth and shape the front pieces into a slight curl under.
For even more over-the-top volume in the back, you can go in with a teasing comb or backcombing brush and lightly backcomb the underside of the stacked section before smoothing the top layer over.
It’s like a perfect little volume cushion that makes hair look so thick and luxurious!
A light mist of anti-humidity hairspray will lock in all that lushness.
If you’re craving major volume in the back to balance out your fine hair, look no further than the almighty stacked bo
Those gravity-defying layers are the closest thing to sorcery I’ve found for faking dense, plentiful hair with loads of structure and movement.
Give it a whirl and get ready to be blown away by your voluminous new ‘do!
💥
Jaw-Length Bob with Curtain Bangs


Considering curtain bangs?
✂️ They’re the trendiest fringe style right now and a match made in heaven with a jaw-length bob for fine hair!
This pairing creates the perfect amount of face-framing, volumizing magic that takes limp strands to bombshell status in a snap.
If you’re not familiar, curtain bangs are those delightfully breezy, 70s-inspired bangs that are parted down the center and sweep away to either side, almost like curtains framing a window.
They hit around the cheekbones and can be cut straight across or in a slight arc shape for a softer effect.
Think French charm meets laidback bohemian beauty – that’s the curtain bang essence!
On fine hair, curtain bangs are a godsend because they instantly add lift and volume right where we need it most: smack dab in the center of the face and forehead
That gentle swoop of hair on either side builds in movement and body, tricking the eye into seeing more density and fluff.
Plus, the center part and diagonal direction of curtain bangs elongate the face for a slimming effect.
I find the wispy, piecey texture of curtain bangs works really well with fine hair because it doesn’t overwhelm dainty strands.
The key is having your stylist cut them with more of a vertical angle and lots of airy, texturized ends rather than a blunt, heavy line.
This allows the bangs to be soft and flowy without any awkward gaps or sparseness.
Pair those dreamy curtain bangs with a jaw-length bob and you’ve got yourself the ultimate flattering, volumizing cut.
I prefer a bob that has some light layering throughout the length and around the face, as opposed to a strictly blunt perimeter.
Having some shorter face-framing pieces cut in prevents the curtain bangs from jutting out too far and lying flat.
When it comes to styling this dynamic duo, the trick is to really focus on lifting and volumizing the roots, especially in the bang area.
I like to prep towel-dried hair with a liberal mist of thickening spray or root-lift spray gel all over, then use my fingers to massage the product into the roots while fluffing hair in an upwards direction.
Then I take a medium round brush and blowdry the bangs forwards, rolling the brush back off the face as I get to the ends to create that perfect curtain swoop.
I find flipping your head upside down and blowdrying the rest of the bob that way helps build and maintain volume throughout.
Finish with a light dusting of dry shampoo or texture spray for some grit.
And voilà!
🙌 Bombshell hair unlocked.
The combination of curtain bangs and a jaw-length bob is pure magic for fine hair, creating lift, movement, and a flirty, face-framing silhouette with a few simple snips.
If you’re looking for a feminine, volumizing cut you can style in a flash, this is it!
Asymmetrical Bob for an Edgy, Voluminous Look

Want to amp up the edge factor while scoring some serious volume?
An asymmetrical bob is a bold, fashion-forward choice that will make your fine hair the center of attention.
⚡️
It’s all about that slightly uneven, off-kilter shape that creates drama and dimension from every angle.
Unlike a traditional bob that’s cut to one uniform length, an asymmetrical bob is longer on one side than the other.
The difference in length can range from subtly longer pieces on one side to a full-blown undercut situation with the shorter side shaved – it all depends on how extreme you want to go!
I personally love the look of chin length on one side with the other side grazing the collarbone for some extra flair.
The beauty of an asymmetrical bob is that it’s specifically designed to make fine hair look thicker and fuller.
💇♀️
By cutting some pieces shorter while leaving others longer, you’re essentially building a voluminous silhouette and tricking the eye into seeing more depth and heft.
The graduation from short to long also prevents hair from falling in a flat sheet and instead encourages movement and body.
For fine hair, I find an asymmetrical bob with some added face-framing layers and a side-swept fringe looks phenomenal.
Having your stylist cut in a slightly longer, diagonal bang on the longer side of the bob creates gorgeous lift and swoop right where you want it.
It’s like a built-in volume boost!
Just make sure they slice into the ends with thinning shears to avoid a bulky, triangular look.
When it comes to styling an asymmetrical bob, I prefer to embrace the natural rocker vibes and go for an edgy, piecey texture.
I start by applying a texturizing mousse or salt spray to damp strands, scrunching as I go for some grit and hold.
Then I use my fingers to rough dry my hair in different directions for an imperfect, messy look.
Once it’s about 80% dry, I take random 1-inch sections and wrap them around a curling wand, rotating away from my face, for some loose bends and movement.
After letting the curls cool for a few minutes, I rake through with my fingers to break them up and create that perfectly undone texture.
A few spritzes of dry texture spray and I’m good to go!
I love how versatile an asym bob is for shifting the part and volume placement.
If I want some extra drama, I’ll go for a super deep side part on the longer side and let the heavier section hang over my eye for a peek-a-boo effect.
For a more balanced look, I part it slightly off-center on the shorter side and let the longer side sweep across my face.
The sky’s the limit!
If you’re craving an edgy, head-turning cut that will make your fine hair look wildly voluminous and cool, an asymmetrical bob is it.
Prepare to stop traffic and collect compliments with this statement-making chop!
🚨💇♀️
Blowout Bob: Bouncy Volume for Special Occasions

Sometimes a girl just needs to go full-on glam, and that’s where a blowout bob comes in to play.
💃
This ultra-polished, uber-bouncy variation on the classic bob is my go-to when I want to give my fine hair an extra zhuzh of red carpet-worthy volume and shine for a special event.
The blowout bob is all about recreating that fresh-from-the-salon, bombshell blowout look at home.
We’re talking tons of lift at the roots, soft curled-under ends, and an all-over gleaming finish that looks straight out of a shampoo commercial.
It’s like Victoria’s Secret hair, but make it bob – all the sexy, tousled volume and movement in a chic, abbreviated package.
To get the look, I start with a volumizing blowdry routine on freshly washed hair.
I’m a big proponent of “root-centric” styling for fine hair, which basically means focusing most of your products and techniques on the roots for maximum lift and fullness.
I like to start by applying a generous dollop of volumizing mousse or root-lift spray gel directly to my roots, massaging it in with my fingertips while lifting hair away from the scalp.
Then I take my blowdryer and dry my hair upside down until it’s about 80% dry, using my fingers to continually lift and fluff the roots for extra oomph.
Flipping your head over not only speeds up drying time, but also creates killer volume and gives your arms a nice workout!
💪 Just make sure to keep the nozzle at least 6 inches away and use a heat protectant spray to prevent damage.
Once my hair is mostly dry and mega-lifted, I flip back up and grab my trusty round brush to start shaping the bob.
I take 1-inch sections, starting at the back, and blowdry each one forwards and slightly under while rolling the brush through to the ends.
The key is keeping the brush really close to the roots and over-directing each section for maximum volume and bounce.
For the front sections around the face, I like to blow them out with a large round brush, rolling the hair away from my face in big, loose curls.
Once the curls cool, I brush through with a paddle brush for that perfect swoopy, face-framing effect.
Then I set the whole look with a light mist of anti-humidity hairspray for all-night hold and shine.
🌟
The end result is a glamorously full, swingy bob with tons of movement and body.
It’s giving classic Hollywood screen siren with a modern twist – think Marilyn Monroe meets Margot Robbie.
The perfect balance of polished and sexy!
I always feel like I can take on the world with a killer blowout bob, it just has that effect.
💁♀️
Of course, I’ll be real – achieving this look on fine hair can be a bit of a time investment.
It’s not a quick wash-and-go situation by any means.
But for those special occasions where you really want to wow, like weddings, galas, or big date nights, it’s so worth it.
The key is really using the right density-building products and mastering that root volume blowdry technique.
Luckily, even fine-haired girls can fake some serious fullness with the illusion of a blowout bob.
So the next time you have a fancy event on the cal, whip out that round brush and get ready to turn heads with your voluminous, bombshell ‘do!
😘💕
Tousled Lob: Beachy Waves for Days

Okay, so we’ve talked a lot about bobs so far, but what about my long-haired ladies who aren’t quite ready to go for the big chop?
Enter the tousled lob: a universally flattering, volumizing cut that offers the best of both worlds for fine-haired gals.
🙌
For reference, “lob” is just a cute abbreviation for “long bob,” which typically falls somewhere between the collarbone and mid-chest.
It’s a great option if you want to keep some length while still getting rid of limpness and scoring some much-needed volume and body.
Plus, it’s a super versatile cut that can be styled a million different ways, from sleek and straight to wavy and wild.
When it comes to fine hair, I’m a huge proponent of the tousled lob with tons of effortless, beachy texture.
🌊
There’s something about that perfectly imperfect, undone wave that makes fine hair instantly look thicker, fuller, and more voluminous.
It’s like the saltwater and sunshine just plumps up the cuticle and creates all this magical grit and movement.
To get the look, I start by liberally misting a texturizing sea salt spray all over damp hair, really focusing on the midlengths and ends.
I find salt sprays work wonders for encouraging natural wave and building grip and hold in fine hair.
Then I either let my hair air dry for a more relaxed, breezy vibe, or use my diffuser attachment on low speed and heat to speed up the process.
Once my hair is about 90% dry, I go in with a 1.
5 inch curling iron or wand to define and enhance my waves.
I like to take medium-sized sections and wrap them around the barrel, alternating the direction of the curls for a more organic, effortless look.
For the front pieces, I always curl away from my face for that beachy, cascading effect.
After letting the waves cool for a few minutes, I flip my head over and shake them out with my fingers, really breaking up the curls and creating that messy, piecey texture.
I find this step is key for fine hair, as it prevents the waves from looking too “done” or prom-y.
A few spritzes of dry texture spray and a light zhuzh with my fingers and I’m good to go!
The beautiful thing about a tousled lob is that it looks even better on day two or three, as the natural oils from your scalp really amp up the separation and definition of the waves.
I like to extend the life of my style by sleeping on a silk pillowcase and refreshing with a combo of dry shampoo and texture spray in the morning.
It’s the ultimate low-maintenance, high-impact cut for fine hair!
One of my favorite variations on the tousled lob is to add some subtle balayage or babylights for a sun-kissed, surfer girl effect.
🏄♀️
Having your stylist paint on a few lighter pieces, especially around the face and through the ends, creates the illusion of thicker, more dimensional hair.
It’s like a permanent filter that makes your waves pop and gives you that fresh-off-the-beach glow year-round.
So if you’re looking for a cut that will give you tons of volume, movement, and easy styling options without sacrificing too much length, the tousled lob is your girl.
Unleash your inner beach babe and get ready to make some serious waves!
🌊💁♀️
Side-Parted Sleek Bob for a Volumized Vibe


As much as I adore the carefree, undone vibe of a textured lob or airy layers, sometimes a girl just wants to feel sleek, polished, and put-together.
That’s where a side-parted sleek bob comes in to make all your chic, sophisticated hair dreams come true.
😍
There’s just something about a glossy, streamlined bob that exudes confidence and glamour.
It’s like an instant power cut that makes you feel ready to take on the world, or at least a very important meeting.
And while fine hair and sleek styles don’t always go hand in hand, there are definitely ways to achieve this look without sacrificing volume or fullness.
First things first, let’s talk about that deep side part.
Believe it or not, something as simple as where you part your hair can actually make a big difference in how thick and voluminous it appears.
I’ve found that starting your part lower down on the side of your head, almost in line with the arch of your eyebrow, instantly creates more lift and body at the roots.
💥
By shifting your part to the side and flipping a larger section of hair over to one side, you’re essentially doubling up on the density and creating an optical illusion of thicker, fuller hair.
It’s like a little volume cheat code!
Plus, the deep side part adds a touch of Old Hollywood glam that elevates the sleekness of the bob.
Now, on to styling.
The key to a sleek bob on fine hair is all about creating smoothness and shine without flattening or weighing things down.
I like to start by applying a weightless volumizing lotion or blowdry spray to my damp roots, then use a paddle brush to blowdry my hair straight, making sure to really lift and focus on the roots for maximum volume.
Once my hair is about 80% dry, I go in with a flat iron to smooth and polish the ends.
I find using smaller sections and a lower heat setting helps prevent any accidental damage or limpness.
The trick is to keep the flat iron moving quickly and to angle it slightly inward as you get to the ends, creating a subtle curve that hugs your jawline.
📐
For the finishing touch, I take a pea-sized amount of smoothing serum or oil and lightly run it over the very ends of my hair for a glossy, frizz-free finish.
Then I mist on a light veil of anti-humidity hairspray to lock in the sleekness and add some extra shine.
The end result is a bob so smooth and reflective, you can practically see your reflection in it!
✨
I love how versatile a side-parted sleek bob is for different occasions and aesthetics.
It can easily go from day to night with a quick touch-up and a swipe of bold lipstick.
For a more understated, minimalist vibe, I keep the ends straighter and blunter.
But for a night out or special event, I’ll add a bit more curve and movement throughout the length for some extra sass.
One thing to keep in mind with a sleek bob is that it can be a bit high-maintenance, especially on fine hair that’s prone to frizzing or falling flat.
I definitely recommend investing in a good heat protectant spray and anti-humectant product to extend the life of your style.
And don’t be afraid to reach for the dry shampoo on day two or three to soak up any excess oil and revive the volume.
But with a little extra TLC and the right styling tricks, a side-parted sleek bob can be a real game-changer for fine hair.
It’s proof that you don’t have to sacrifice volume for polish, or style for substance.
So go ahead and unleash your inner boss babe with this powerhouse cut!
💪👑
Bob with Choppy Bangs


Bangs are like the secret weapon of the hair world, especially when it comes to fine hair.
✂️
They’re an instant way to add lift, volume, and dimension right where you need it most – front and center!
And when paired with a chic bob haircut, they create a seriously adorable, face-framing effect that’s to die for.
Now, I know what you might be thinking – “Bangs?
On my fine hair?
No way!” But hear me out.
The key is to go for a bang style that’s piece-y, choppy, and a bit on the longer side rather than a heavy, blunt fringe.
Think French-girl effortless rather than Pinterest-perfect precise.
Choppy bangs are the ultimate cool-girl fringe, with longer, razor-cut strands that can be worn swept to the side or parted down the middle for a more laid-back look.
The jagged, uneven texture adds a touch of rock-n-roll edge while also helping to disguise any sparseness or gaps in fine hair.
It’s like a built-in volumizer!
To get the look, ask your stylist for bangs that graze the eyebrows or even slightly longer, with lots of piece-y texture cut into the ends.
I find it helps to bring in some reference photos of your favorite choppy bang looks to give them a clear idea of the vibe you’re going for.
Make sure they use thinning shears or a razor tool to really break up the ends and create that perfectly imperfect finish.
When it comes to styling choppy bangs, I’m all about embracing the mess.
😜 I like to start by applying a small dollop of texturizing cream or pomade to the bangs, then use my fingers to piece them out and create lots of separation and definition.
The goal is to enhance that choppy, piecey texture rather than trying to smooth or tame it.
If my bangs are looking a little too fluffy or unruly, I’ll go in with a flat iron and lightly tap the ends to create a more piecey effect.
Just be sure to use a light hand and low heat setting to avoid any accidental burns or damage.
Then I’ll finish with a quick mist of light-hold hairspray to keep everything in place without looking crunchy.
I love how versatile choppy bangs can be for different styling moods and occasions.
For a more edgy, rock-n-roll vibe, I’ll pair them with a messy, textured bob and lots of black eyeliner.
But for a softer, more romantic look, I’ll add some loose waves throughout the length and sweep the bangs to the side with a few face-framing tendrils.
And can we talk about how insanely cute choppy bangs look with glasses?
🤓
The key is to keep the bangs a bit longer and wispier so they don’t compete with the frames.
I love a tousled bob with some cheekbone-grazing side bangs and a pair of oversized tortoiseshell glasses for a chic, librarian-inspired look.
The best part about choppy bangs is that they’re incredibly low-maintenance, especially for fine hair.
Unlike heavy, blunt bangs that require daily trims and heat styling, choppy bangs can grow out seamlessly and look even better with a bit of natural texture and movement.
Plus, they’re a great way to ease into the world of bangs if you’re not quite ready for a full-on fringe commitment.
So if you’re looking to add some serious style and volume to your fine hair without a ton of extra effort, consider taking the plunge with some choppy bangs.
Paired with a classic bob or even a shorter pixie cut, they’re the ultimate cool-girl accessory that will make you look effortlessly chic, no matter the occasion.
😎👌
French Bob: Chic Volume for the Fearless


If you’re in the mood for a dramatic hair transformation that will make you feel like the chicest girl in the room, look no further than the French bob.
💇♀️
This iconic cut is a favorite among cool-girl Parisians and fashion week regulars alike, and for good reason – it’s the ultimate statement of effortless, insouciant style.
The French bob is defined by its jaw-length cut, blunt ends, and piece-y micro bangs that graze the eyebrows and curve in slightly to hug the cheekbones.
It’s a cut that screams confidence and joie de vivre, with a touch of vintage 1920s charm thrown in for good measure.
Think Louise Brooks meets Jean Seberg – timeless, gamine, and oh-so-French.
What I love about the French bob for fine hair is that it actually works with your texture rather than against it.
The blunt, single-length cut creates the illusion of thickness and density, while the curved micro bangs add some much-needed lift and volume at the crown.
It’s a cut that maximizes the look of fullness without relying on a ton of layers or texturizing.
Of course, the French bob is not for the faint of heart.
It’s a bold, statement-making cut that requires a certain level of moxie and devil-may-care attitude to pull off.
But if you’re feeling daring and want to channel your inner French girl, I say go for it!
Life’s too short for boring hair, after all.
💁♀️
To style a French bob, I like to keep things simple and let the cut do the talking.
I start by applying a small amount of volumizing mousse or root lift spray to damp hair, focusing on the roots and crown area.
Then I’ll use a paddle brush to blow dry my hair straight, making sure to create lots of lift and volume at the roots by pulling the hair upwards as I dry.
Once my hair is completely dry, I’ll go in with a flat iron to create a sleek, polished finish, curving the ends inward slightly to hug my jawline.
For the micro bangs, I like to use a small round brush to blow them out, curving them inwards towards my cheekbones for that signature French girl swoop.
A light mist of hairspray and I’m good to go!
The great thing about the French bob is that it looks just as chic styled with a bit of texture and movement as it does sleek and polished.
On days when I want a more low-key, effortless vibe, I’ll skip the flat iron and simply let my hair air dry with a bit of salt spray scrunched in for some natural wave.
The micro bangs can be left a bit piece-y and messy for a more undone, insouciant effect.
As for maintenance, the French bob does require regular trims every 4-6 weeks to maintain its crisp, blunt shape.
But honestly, I find the frequent salon visits to be a small price to pay for a cut that makes me feel like I should be strolling along the Seine with a baguette in hand.
Plus, the shorter length means less styling time and fewer products needed, which is always a win in my book.
One thing to keep in mind with the French bob is that it can be a bit high-maintenance for fine hair, as the blunt cut and short bangs can expose any sparseness or thinning at the crown or hairline.
If you have particularly fine or thin hair, I recommend asking your stylist to add some subtle layering or texturizing to the ends to create a softer, more forgiving shape.
But overall, I think the French bob is a fantastic choice for fine-haired gals who want to make a bold statement and channel their inner Parisian cool-girl.
It’s a cut that proves you don’t need a ton of hair to make a big impact – just a fearless attitude and a killer pair of micro bangs.
Allons-y!
🇫🇷💕
One-Length Bob + Volume-Boosting Layers

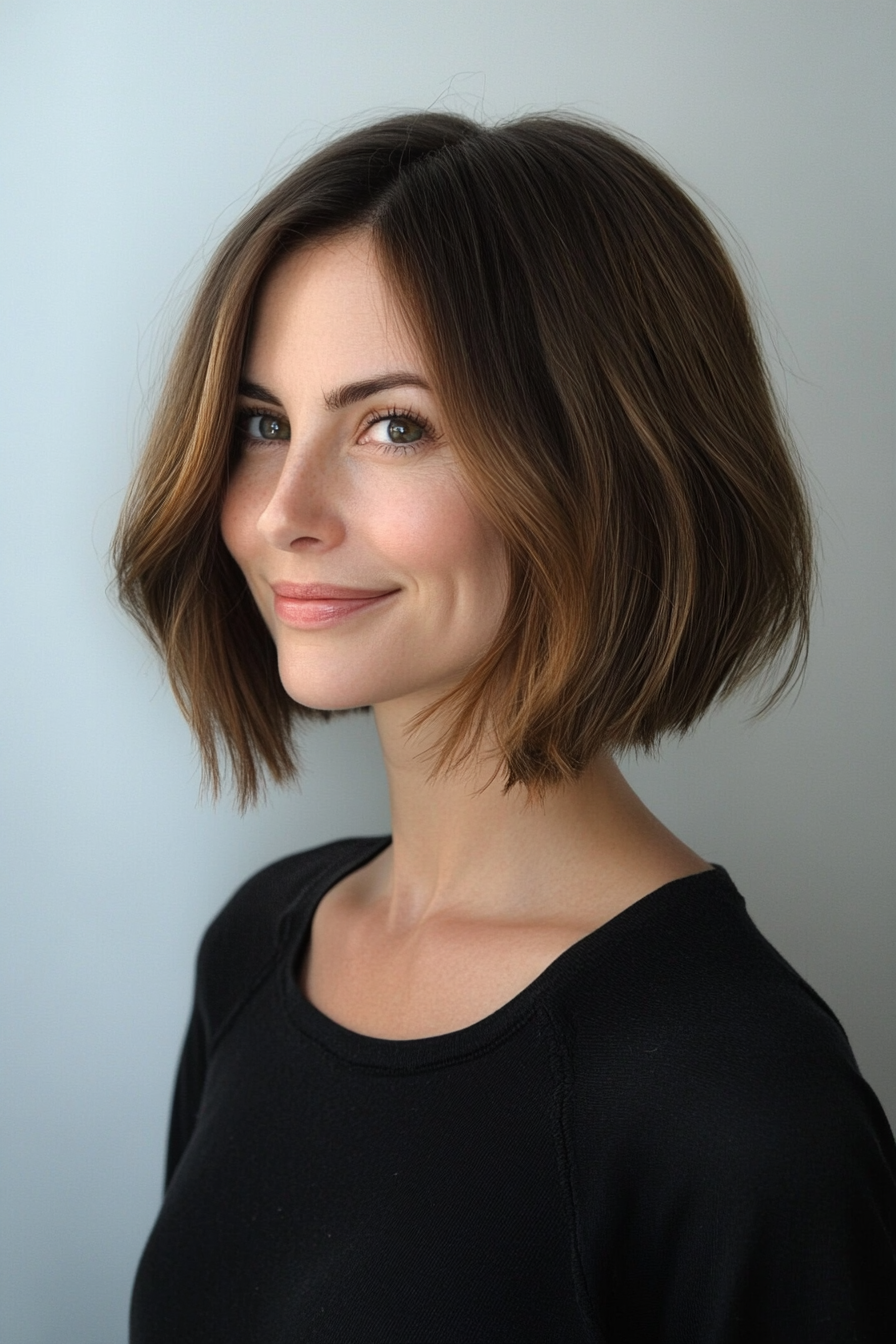
If you’re blessed with fine hair that’s on the denser side, a one-length bob with some sneaky volume-boosting layers could be your ticket to hair nirvana.
💇♀️
This classic cut is all about creating a sleek, polished shape that maximizes the look of thickness and fullness, with a few strategic layers thrown in for good measure.
The key to a one-length bob is to keep the perimeter super blunt and even, with no stacking or graduation in the back.
This creates a strong, graphic shape that tricks the eye into seeing more density and weight, even if your hair is on the finer side.
It’s like an optical illusion for your strands!
But of course, the danger with a single-length cut on fine hair is that it can sometimes fall a bit flat or limp, especially if your hair is prone to getting oily or weighed down.
That’s where some well-placed, hidden layers come in to save the day.
🦸♀️
When I get a one-length bob, I always ask my stylist to cut in a few face-framing layers around the front and some short, barely-there layers through the crown and sides.
These layers are super subtle and blend seamlessly into the overall shape, but they make a world of difference in terms of adding volume, movement, and lift.
The face-framing layers help to soften the bluntness of the bob and create a flattering, face-hugging shape that’s perfect for fine hair.
They also add some much-needed texture and separation around the face, which can help to create the illusion of thickness and density.
Meanwhile, the short layers through the crown and sides work to lift the roots and create a more rounded, voluminous shape overall.
They’re like a secret weapon for fine hair, providing just enough oomph and body without compromising the sleek, polished finish of the bob.
To style a one-length bob with volume-boosting layers, I like to start with a volumizing shampoo and conditioner to really amp up the fullness from the get-go.
Then I’ll apply a golf ball-sized amount of mousse or volumizing spray to my damp roots and comb it through with a wide-tooth comb to distribute evenly.
Next, I’ll use a large round brush to blow dry my hair, focusing on lifting the roots and creating lots of volume and body throughout the crown.
I like to use a bit of tension as I dry, pulling the hair upwards and away from the scalp to really maximize the lift.
Once my hair is about 90% dry, I’ll switch to a flat brush and use it to smooth out the ends and create a sleek, polished finish.
If I want a bit of extra oomph, I might go in with a 1-inch curling iron and add some loose waves through the mid-lengths and ends, but I always make sure to keep the roots and crown area smooth and voluminous.
To finish, I’ll mist on a bit of light-hold hairspray and use my fingers to gently tousle and separate the ends for a more undone, effortless vibe.
And voila – a one-length bob that looks thick, full, and oh-so-chic!
💁♀️
Of course, the key to maintaining a one-length bob with volume-boosting layers is regular trims every 6-8 weeks to keep the shape looking crisp and the layers looking fresh.
I also recommend using a volumizing dry shampoo in between washes to soak up any excess oil and add some instant lift and body to the roots.
Overall, I think a one-length bob with some strategic layers is a fantastic choice for fine-haired gals who crave a classic, polished look with plenty of volume and movement.
It’s a cut that proves you don’t need a ton of layers or texturizing to create a full, luscious effect – just a few well-placed snips and a killer blowout.
Trust me, your hair (and your selfie game) will thank you!
😉📸
Wavy Bob with Side-Swept Bangs


Last but certainly not least, we have the wavy bob with side-swept bangs – a universally flattering, insanely versatile cut that looks amazing on pretty much everyone, but especially those with fine hair.
💁♀️
This cut combines the best of both worlds – the face-framing, volume-boosting benefits of side bangs with the texture and movement of loose, effortless waves.
Let’s start with the side-swept bangs, shall we?
I’m a firm believer that every fine-haired gal should try side bangs at least once in her life, because they’re just that good.
Unlike straight-across bangs, which can sometimes look sparse or wimpy on fine hair, side bangs create a softer, more forgiving effect that’s super easy to style and grow out.
The key to perfect side-swept bangs is to have your stylist cut them slightly longer on one side, angling down towards your cheekbone.
This creates a flattering, face-framing shape that instantly adds lift and volume at the front of your hair.
It also helps to disguise any thinning or sparseness at the hairline, which is a common concern for those with fine hair.
When styling side bangs, I like to use a medium-sized round brush to blow them out, starting with the brush underneath the hair and rolling it forward and up as I dry.
This creates a pretty, swoop-y shape that looks effortless and chic.
If I want a bit more hold, I’ll mist on some light-hold hairspray and gently comb the bangs to the side with my fingers.
Now, let’s talk about those waves.
I find that fine hair looks best with loose, tousled waves that have plenty of movement and separation, rather than tight, uniform curls.
The key is to use a large-barrel curling iron or wand (1.
5-2 inches is my go-to) and wrap large, random sections of hair around the barrel, leaving the ends out for a more undone effect.
I like to start by applying a texturizing spray or salt spray to damp hair and rough-drying it until it’s about 80% dry.
Then I’ll go in with my curling iron and curl large sections of hair away from my face, alternating the direction of the curls for a more natural, effortless look.
Once the waves have cooled, I’ll gently shake them out with my fingers and mist on some dry texture spray for extra piecey-ness and hold.
The result is a head full of perfectly imperfect, beachy waves that look amazing with the soft, face-framing shape of the side bangs.
It’s a cut that’s equal parts romantic and edgy, with a touch of boho charm thrown in for good measure.
And the best part?
It looks even better on the second or third day, when the waves have had a chance to settle and the natural oils from your scalp have added some extra texture and definition.
I love how versatile a wavy bob with side bangs is for different occasions and styling moods.
For a more polished, put-together look, I’ll use a flat iron to smooth out the bangs and add some loose waves through the mid-lengths and ends.
But for a more low-key, weekend vibe, I’ll simply let my hair air-dry with some salt spray scrunched in and rock my natural texture
Messy Shaggy Bob with Lots of Choppy Layers


If you’re like me and love a good “I woke up like this” moment, then a messy shaggy bob with tons of choppy layers is about to become your new go-to.
🙌
This cut is the perfect marriage of edgy rocker chic and effortless, undone cool – think Alexa Chung meets Debbie Harry.
The shaggy bob has been a staple in the cool-girl hair canon for decades, and for good reason.
It’s a cut that’s all about embracing your natural texture and creating lots of movement, volume, and dimension with the help of some strategically placed layers.
And when done right, it can make even the finest, most limp hair look incredibly thick and full.
The key to a shaggy bob is to have your stylist cut in a ton of short, choppy layers throughout the length, focusing on the crown and sides for maximum volume and texture.
I’m talking lots of razor cutting, point cutting, and slicing to create a piecey, disheveled effect that’s the perfect balance of edgy and effortless.
I find the most flattering length for a shaggy bob is somewhere between the chin and shoulders, with the front pieces kept slightly longer than the back for a more modern, graduated shape.
This allows the layers to really stand out and creates a cool, undone texture that looks amazing with fine hair.
When it comes to styling a shaggy bob, the messier the better in my book.
😝
I like to start by applying a texturizing spray or salt spray all over damp hair, scrunching it in with my hands to encourage my natural wave and create some grit and hold.
Then I’ll either let it air dry for a more relaxed, beachy vibe or use a diffuser on low heat to add some extra volume and definition.
Once my hair is about 90% dry, I’ll go in with a 1-inch curling wand and wrap random sections around the barrel, leaving the ends out for a more undone, piecey effect.
I find alternating the direction of the curls and mixing up the sizes of the sections creates a more natural, effortless look.
Then I let the curls cool for a few minutes before shaking them out with my fingers and misting on some dry texture spray for extra